How to connect a SharePoint Online Workspace in MeetingBooster
The first step is to go to your Microsoft Azure Active Directory where you need to add a new application.
Follow the below step-by-step guide to set up a new application in your Azure Active Directory. Make sure to log in to your Azure portal with an Administrator account. The application will be registered in the home Tenant of the account that you use to sign in. (If you have the domain mycompany.com your Azure Active Directory must be set up to use mycompany.com as a custom domain name, and you must log in with an email on the same domain.)
Login to your Microsoft Azure portal with Administrator Account
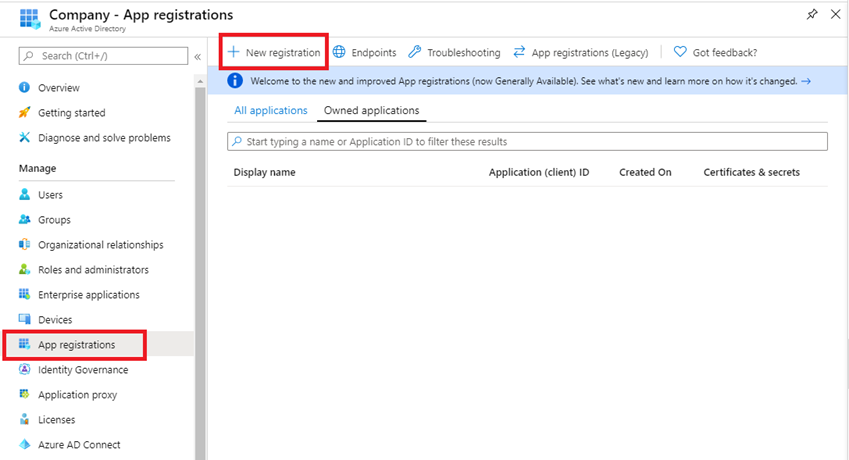
1 . Go to your “Azure Active Directory”.
2. Click the “App registrations” in the left sidebar. (If it is not available, select “All Services” and search for it.)
3. Click ”New registration” at the top.
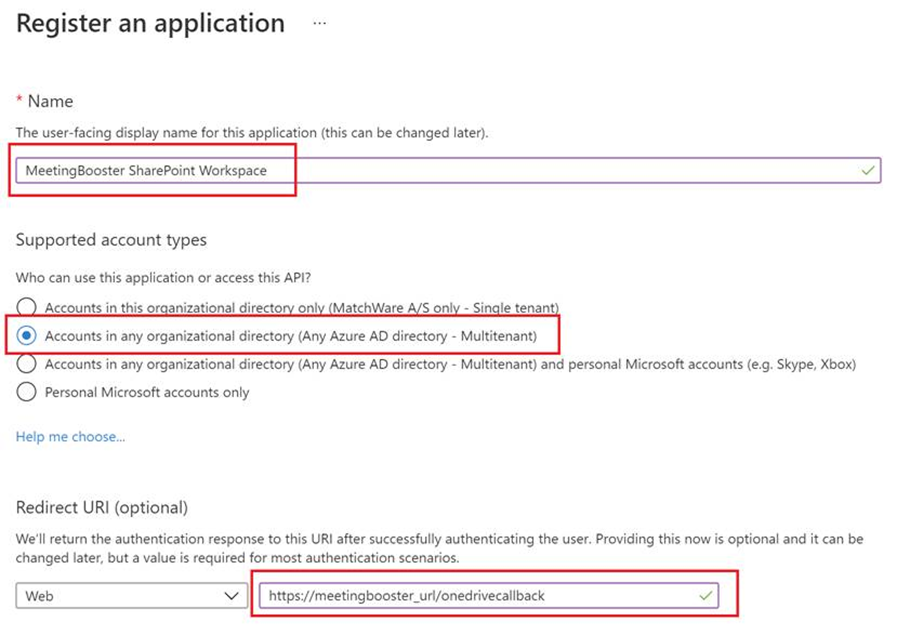
4. Enter a name so you can identify the application.
5. In “Supported account types” choose “Accounts in this organizational directory only”.
6. In “Redirect URI” enter https://meetingbooster_url/onedrivecallback (replace meetingbooster_url with your own MeetingBooster domain).
7. Click “Register”.
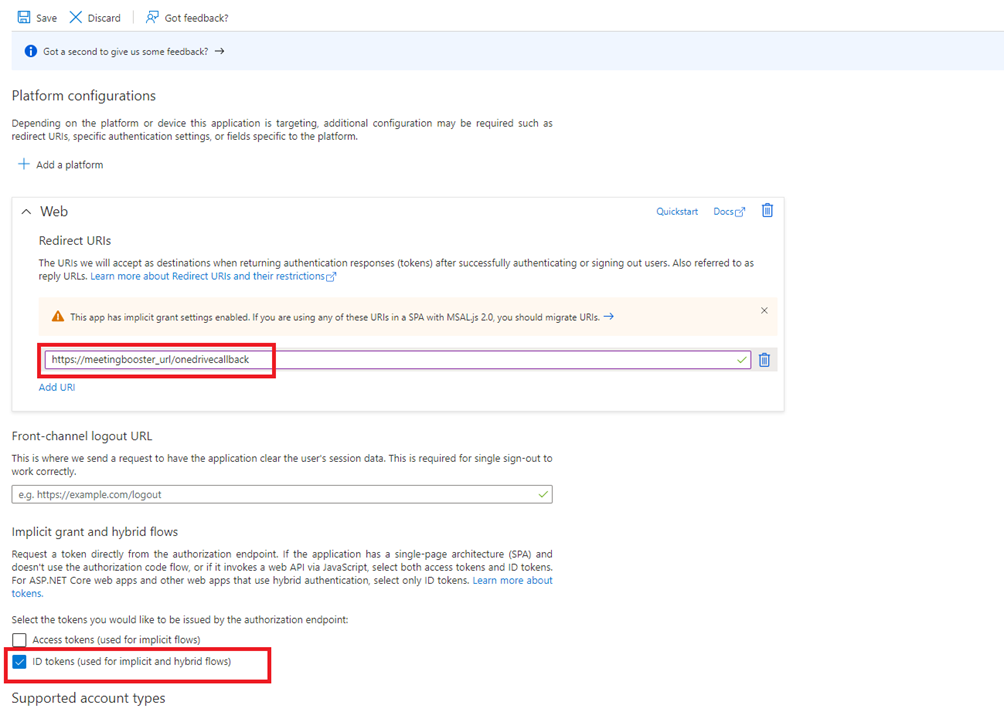
8. Go to “Authentication” for the application you have just created.
9. Add this additional Web redirect URI: https://meetingbooster_url/onedrivecallback (replace “meetingbooster_url” with your own MeetingBooster domain).
10. In the section “Implicit grant” enable “ID tokens”.
11. Click “Save”.
12. Go to “API permissions”.
13. Click “Add a permission”, select “Microsoft Graph”, select “Application permissions”.
14. Enable these permissions and click “Add permission”:
- Files.Read.All
- openid
- profile
- User.Read
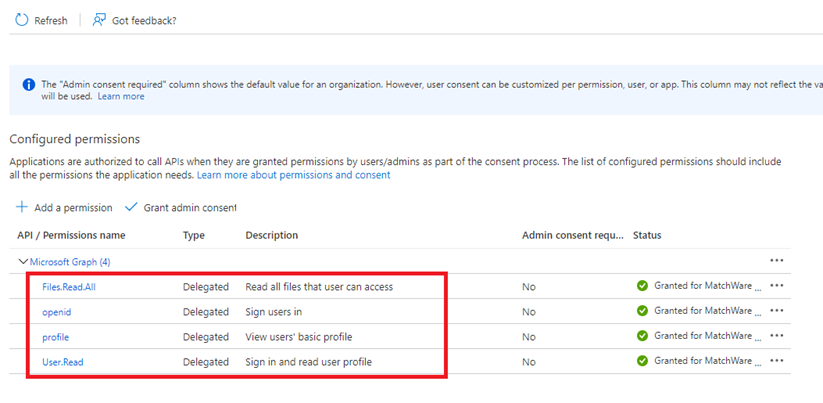
15. Microsoft asks if you want to grant consent for the requested permissions…: Click Yes
MeetingBooster Microsoft SharePoint Workspace setup
1 . Go to “Admin” | “System” | “Workspaces”.
2. Enter the Name and the Application ID of the above-created Application. The Application ID is found in the “Overview” page of the newly created Application in the Azure Portal.
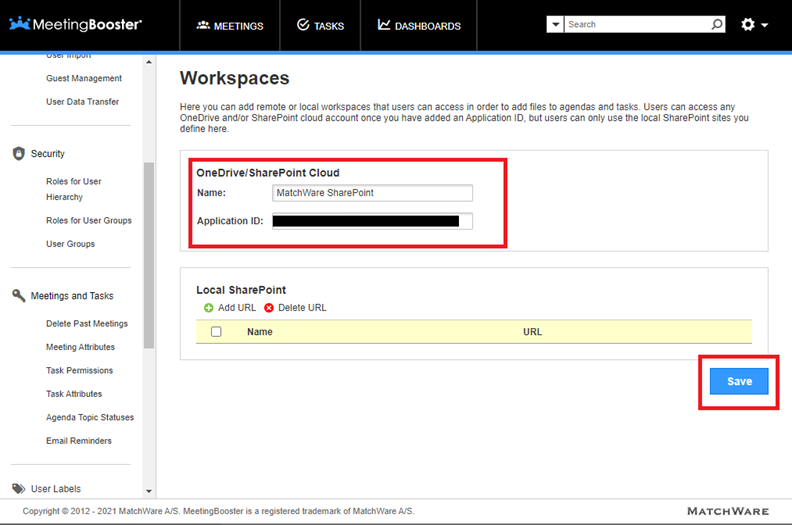
3. Click the “Save” button.