Setting up a Google Client ID for MeetingBooster
Creating a Google Client ID
- Go to the Google Developers Console website (https://console.developers.google.com).
- Log in using your Google account.
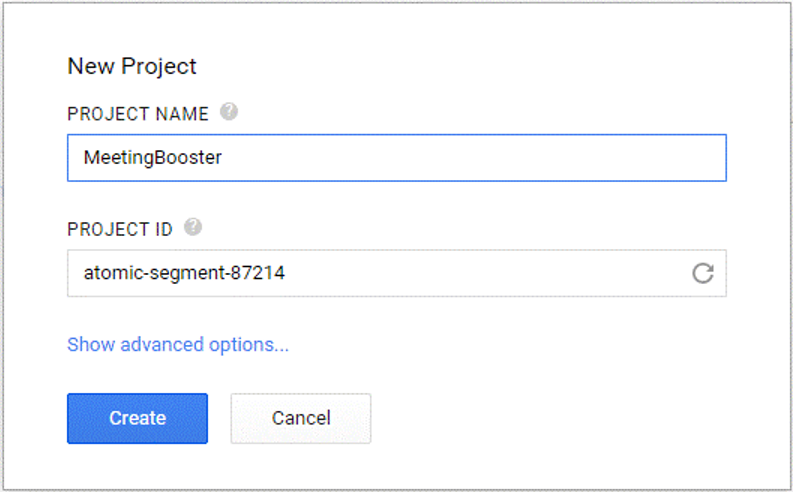
- Under Projects, click Create project.
- In the dialog that opens, enter a name for the project such as “MeetingBooster” and click Create.
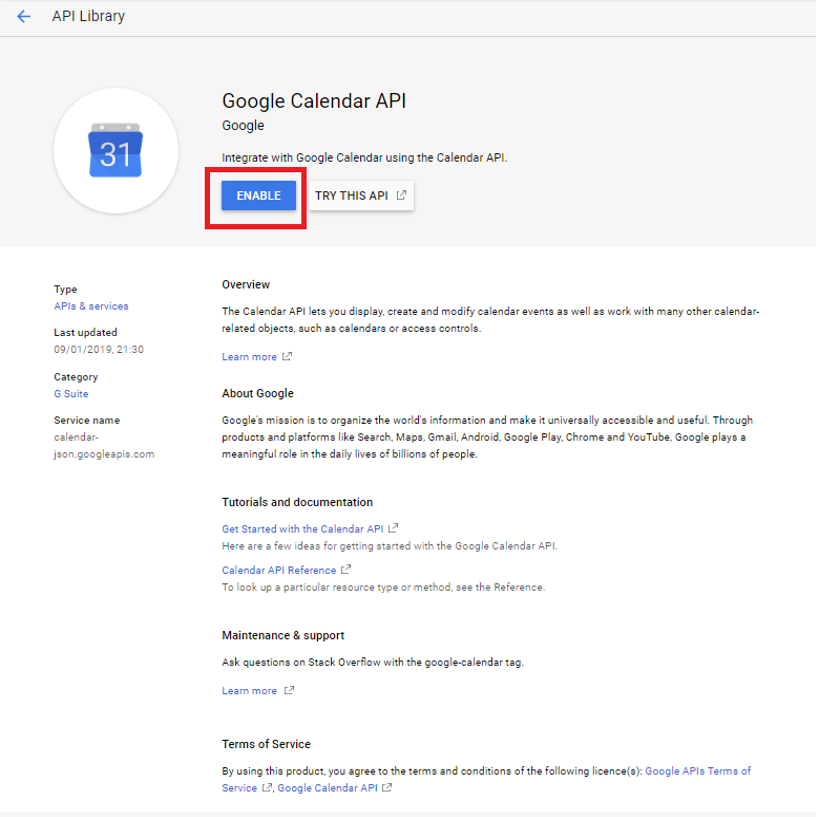
- Enabling the Google Calendar API
- Click the Library tab and search for “Google Calendar API” and click Enable

- Go to the OAuth consent screen under Credentials, complete the fields for the consent screen and click Save.
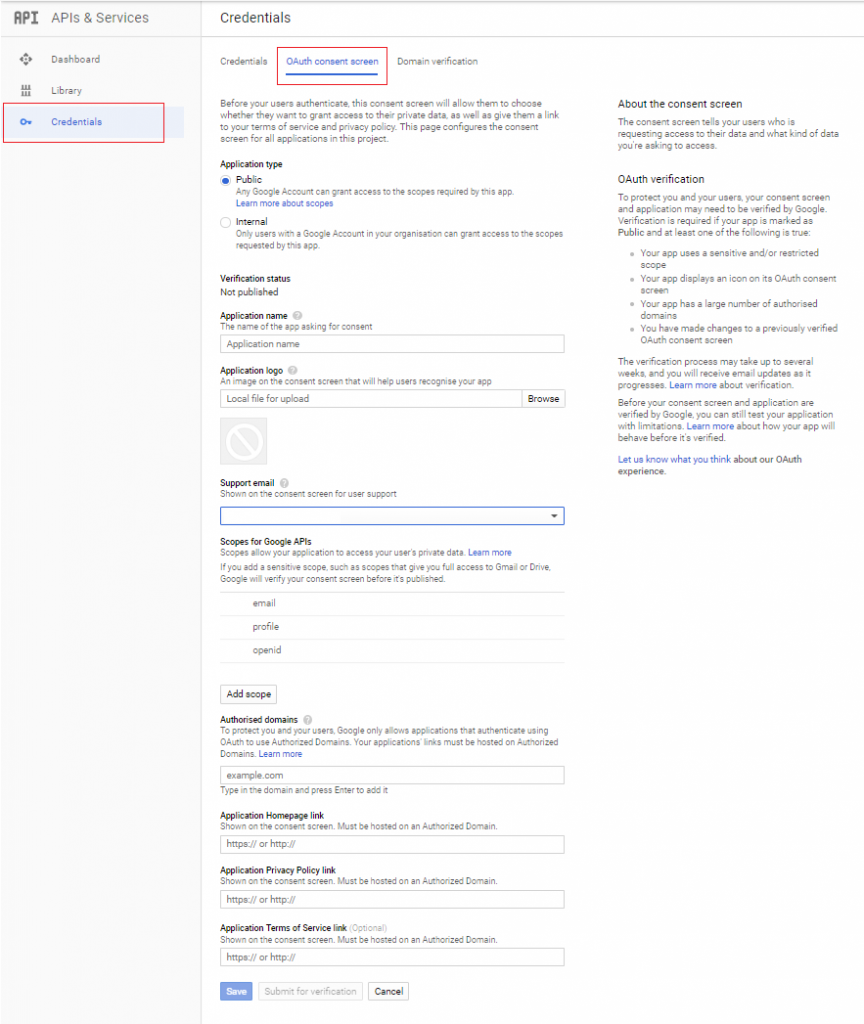
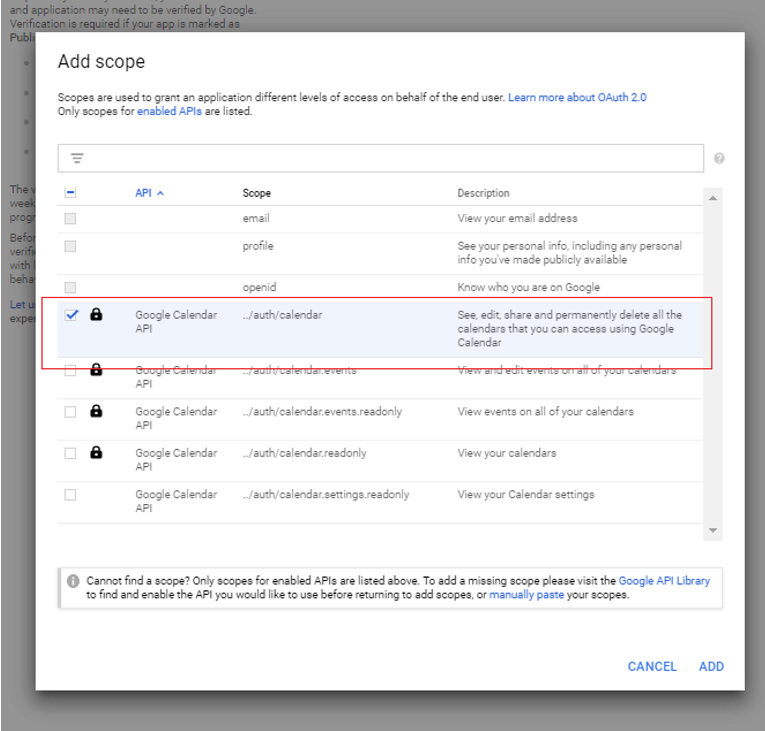
NB. Make sure to Add scope and include the Google Calendar API with “View, edit, share and permanently delete all the calendars that you can access using Google Calendar”.
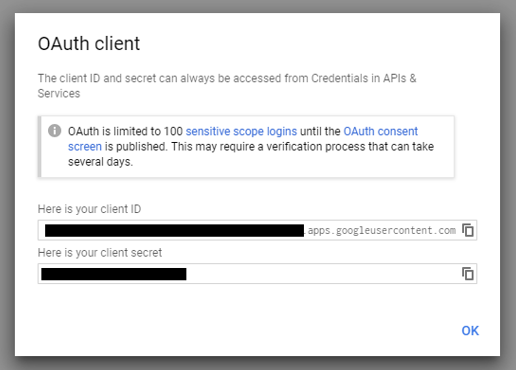
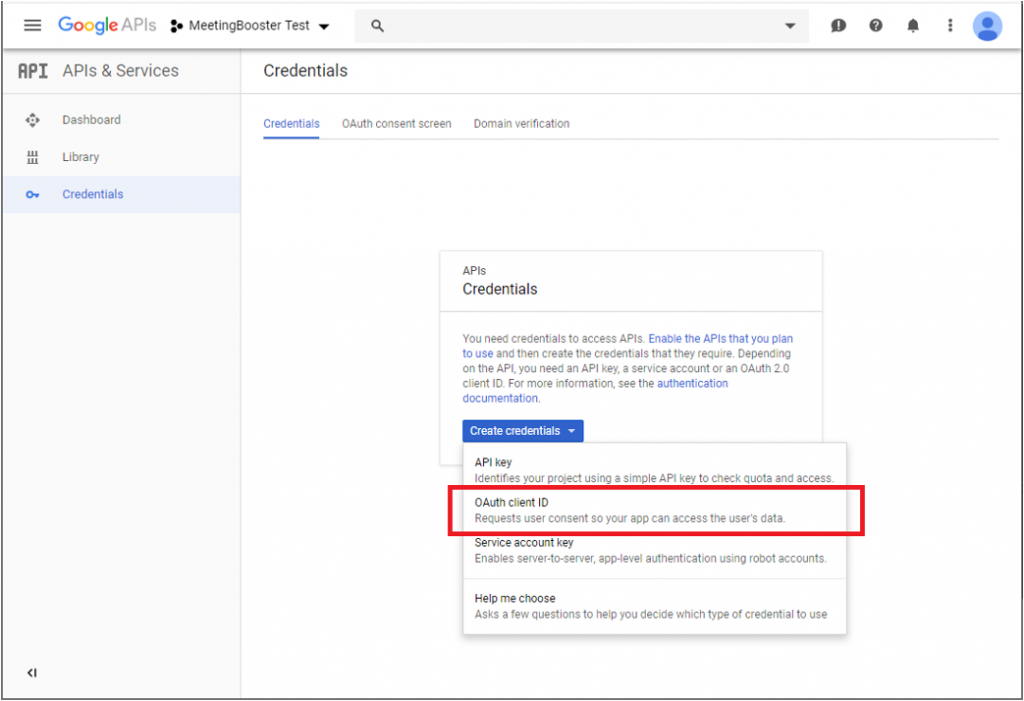
- Go to Credentials and create new OAuth client ID.
- Select Web application and complete the following fields:
- In the Authorized JavaScript Origins field, enter the domain name of the MeetingBooster server.
- In the Authorized Redirect Uris field, enter: https://xxx/GoogleAuth/Callback, where xxx is the domain name of the MeetingBooster server.
NB: The Authorized Redirect Uris field is case sensitive so make sure to use the casing used in your PublicServerURL + GoogleAuth/Callback.
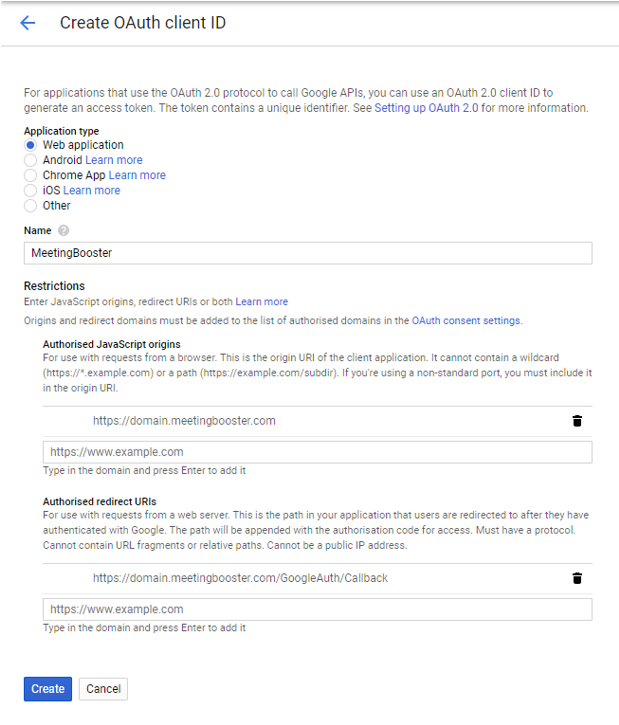
- Click Create to get your client ID and client secret to use in your MeetingBooster setup.
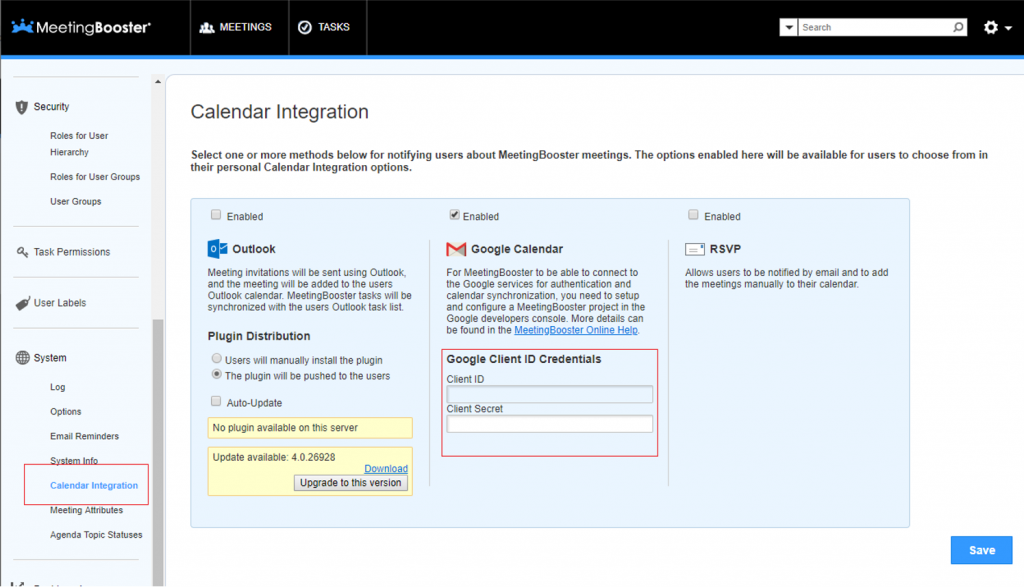
- Copy the client ID and the client secret into the Google Calendar setup in MeetingBooster (MeetingBooster > Admin > System > Calendar Integration).