Installing MindView 7 through a network deployment
The Windows® Installer can perform an administrative installation of an application or product to a network for use by a workgroup. Alternatively, you can extract the contents of the .exe file so that you or the users in your organization can install MindView using the .msi file.
After performing an administrative installation or extracting the .msi file, you can push the installation to client computers in the domain using Group Policies or a different installation methodology.
To find out more about Windows® Installer and administrative installations, please refer to the Microsoft web site.
Creating an administrative installation
You can create an administrative installation from the command line as follows. The procedure extracts a complete source image of the application (similar to the source image found on a DVD).
Choose Start | Run.
Tip: You can hold down the Windows button and press R
Use the Browse button to locate the downloaded MindView installation package.
Insert the command line option /a // after the path to the installation package as in the example below:
C:\downloaded files\mindview7_<language>_<build>.exe /a //
Click OK to start the Administrative Installation Wizard.
The administrative installation dialog
When the administrative installation starts you will see the following dialog (Figure 1):
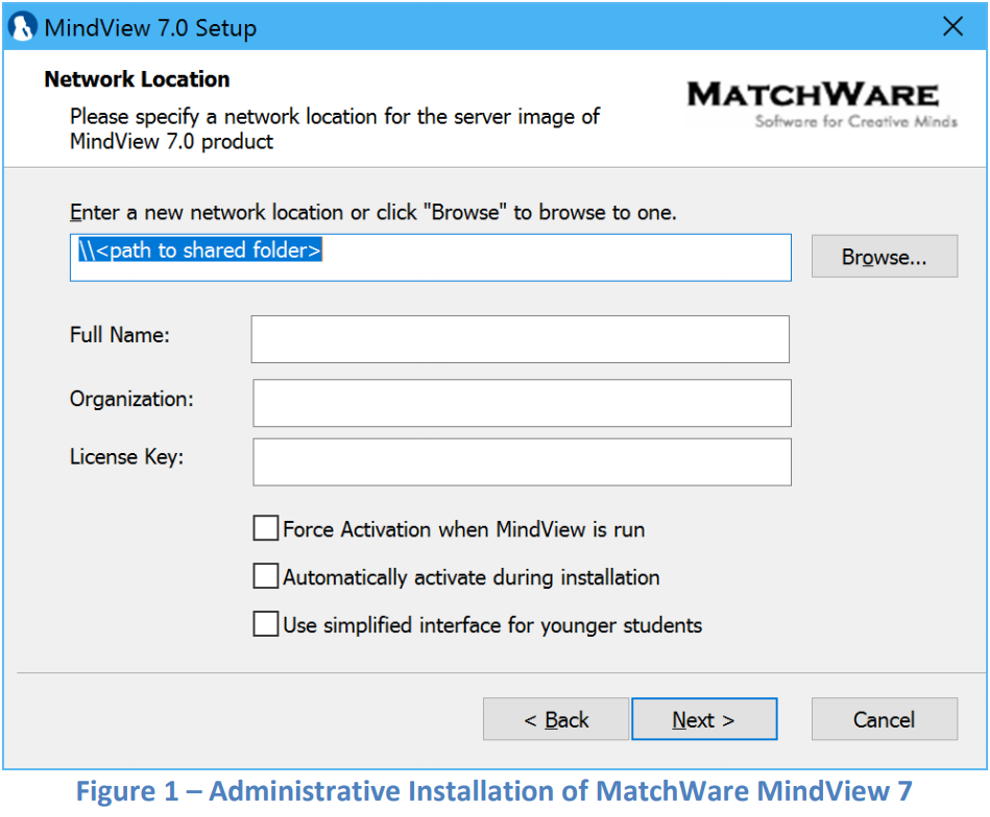
Specify the following in that dialog:
- The location of the installation package
- The Username and Company Name to use as default
- The License Key
- (optional) Check ‘Force activation when MindView is run’ if you want MindView to be automatically activated the first time the program runs.
- (optional) Check ‘Automatically activate during installation’ if you want to activate MindView during installation.
- (optional) Check ‘Use simplified interface for younger students’ if you want MindView to enable the simplified interface as default.
These three activation options are “silent” (i.e. they do not display any messages).
The above options are stored in a file called “admin.ini” in the destination folder. You can edit this file using a text editor like Notepad if you want to change the options without making a new administrative installation.